Procreate’s a seriously powerful and flexible digital illustration app—if you’ve got an iPad, you’re probably at least a little bit tempted to give it a spin. With its intuitive interface, plus a wild variety of brushes and tools, it opens up a ton of possibilities for anyone itching to get creative.
Diving into creative uses for Procreate is a great way to unlock new skills and get even more out of your digital art journey. Whether you’re just starting out or you’ve been at this for years, there’s a surprising number of cool ways to use the app that go way beyond just basic sketching or doodling.
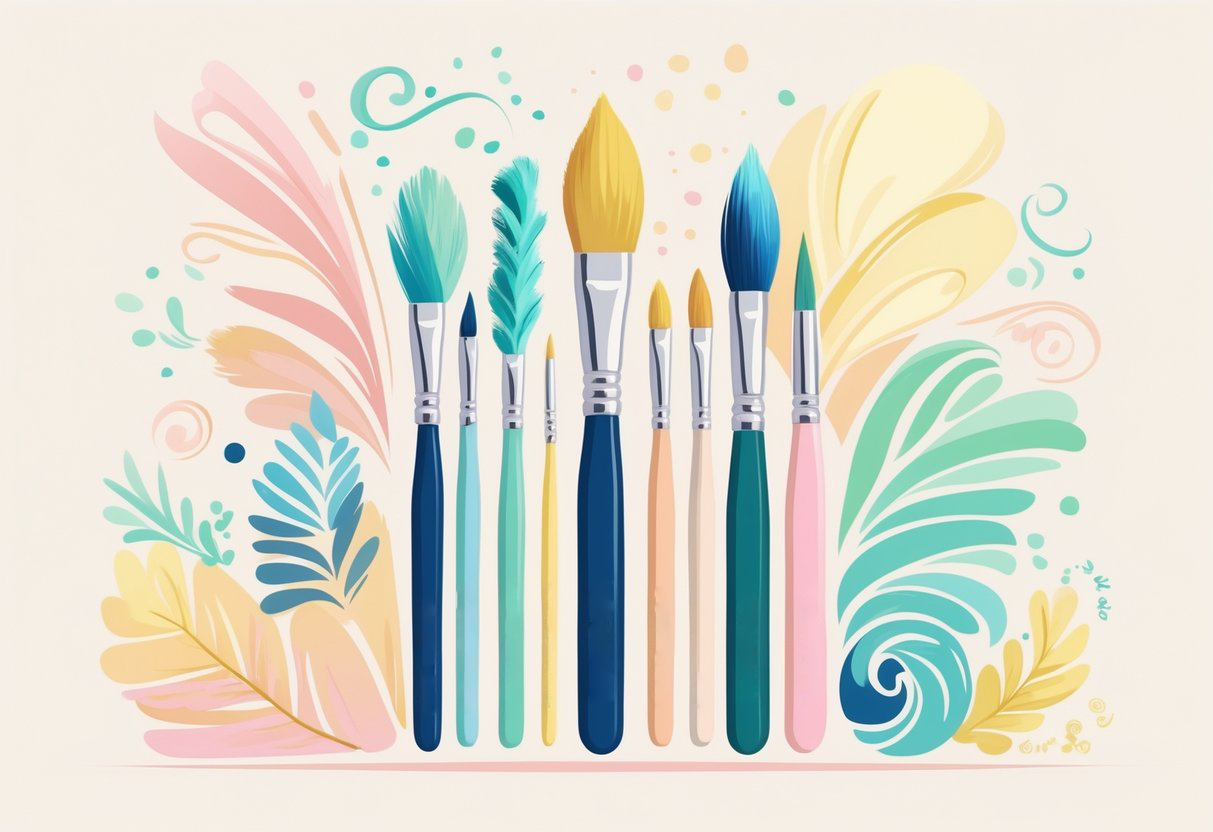
1. Create custom digital brushes
One of the neatest things about Procreate is you can design your own digital brushes. That means you get total control over how your strokes show up on the canvas, which is pretty liberating. You can tweak brushes to fit really specific needs or just to match your personal style.
Just head to the Brush Library and tap that “+” button—suddenly you’re in Brush Studio, where all the magic happens. Here, you can mess around with settings like shape, grain, flow, and opacity. It’s a bit of a playground, honestly.
Try changing the shape source by importing a photo or something you’ve drawn by hand. That’s what sets the basic look of your brush tip. The grain source? It decides the texture you’ll see as you draw.
Fine-tune how your brush reacts to pressure and tilt from the Apple Pencil. If you’re after subtle line variations or want to nail those blending effects, this is where you’ll spend some time. Messing with jitter and scatter can make your brush marks feel less digital, more “real.”
There are also options for how the brush plays with color. You can make brushes that smudge, blend, or react in quirky ways as you layer your strokes. It’s especially handy for textures like skin, hair, or fabric—stuff that’s tricky to fake with basic brushes.
Once you’re happy, save your custom brushes right in the Brush Library. You can even share them with friends or download brushes from other artists—there’s a whole community out there trading brush packs for every style under the sun.
Custom brushes are a game changer for illustration, lettering, and concept art. Having your own set of tools speeds things up and helps your work look, well, more like you. Procreate’s brush system is surprisingly deep, and you can tinker with a bunch of settings without needing any extra software.
As you get more comfortable, it’s fun to experiment—try out different shape and grain combos, or see how changing the dynamics shifts your style. Sometimes the weirdest settings turn out to be the most interesting.
If you’re not sure where to begin, just duplicate an existing brush and start messing with its properties. That’s probably the fastest way to see what does what. Eventually, you’ll figure out which tweaks really make a difference in your art.
Honestly, building custom digital brushes in Procreate isn’t hard at all. It gives you a ton of creative freedom for almost any project. Most artists notice their work gets better as they invest time in making brushes that feel just right for them.
2. Design unique typography lettering
With Procreate, you can whip up custom lettering styles for any mood or project. The app’s got a huge selection of brushes and tools, so experimenting with both classic and modern type designs feels pretty effortless.
You might start by sketching out your idea freehand, or just use the text tool to lay down a basic template. Playing with brush size, opacity, and pressure sensitivity can help you mimic all sorts of traditional calligraphy and hand-lettering vibes.
Try layering and blending effects to give your lettering some real depth or shadow. Textured brushes are great for creating finishes that look like chalk, paint, or ink—little touches that make your text pop.
If you want to get a feel for letterforms, import a reference font and trace over it. It’s a super practical way to learn proportions, especially if you’re just dipping your toes into hand lettering or want to explore different styles.
Procreate’s color picker and palette tools make it easy to play with combinations. Don’t be afraid to try gradients or metallic effects—just layer different colors and tweak their blending modes for a bit of extra flair.
For more control, use the selection tool to isolate individual letters or groups. That way, you can move, resize, or rotate parts of your typography without messing up the rest of the design.
Mixing typography with illustration is another fun route. You can weave your letters into decorative elements or backgrounds, which really brings posters, social graphics, or whatever you’re making to life.
Messed up? Or just want to try something wild? Procreate’s undo and redo buttons are always there, so you can experiment without any real risk.
Save your favorite brush setups or make custom brushes to speed things up on future projects. When you’re happy with your design, exporting as a high-res file is a breeze—perfect for both online and print.
Keeping complex typography projects organized is way easier if you use layer groups and give them sensible names. Trust me, it’ll save you headaches when you’re juggling multiple versions or styles in one file.
3. Illustrate children’s book characters
Procreate makes it pretty painless to design fun, imaginative characters for children’s books. Its brush library and adjustment tools let you play with all sorts of illustration styles, from simple cartoons to more detailed, textured folks.
Layering tools mean you can separate every part of your character—like eyes, clothes, or hair—onto different layers. That way, tweaking colors or details is no big deal, and you don’t have to worry about ruining something else.
The symmetry tool is a lifesaver for balanced faces and bodies. Draw on one side and Procreate mirrors it for you, which is a huge time saver and makes things look super consistent.
If you want to try out a bunch of looks for one character, the QuickShape and color drop features make it fast. You can block in shapes and fill them with color in seconds, so you’ll know right away which design fits your story best.
Procreate’s animation tools let you make simple frame-by-frame movements. It’s surprisingly helpful to see your character in different poses or with different expressions—perfect for planning out scenes or just getting a feel for their personality.
Importing reference images helps keep your characters consistent across the whole book. The split-screen feature is handy too; you can trace over references or just keep them visible as you work.
Add texture with built-in brushes or bring in your own for unique hair, clothing, or skin effects. Little touches like that give your characters real personality and help them stand out on every page.
The time-lapse recording feature is fun for reviewing your process or sharing it with others. It’s a cool way to track how your characters develop—or just to show off your technique.
Once you’re happy with your designs, exporting high-res files is straightforward. You’ll have print-ready images or digital assets that drop right into your book layouts, making the whole process smoother.
With Procreate, you get loads of flexibility in both style and workflow. Whether you’re designing a single hero or a whole cast, you can experiment, tweak, and finish up your characters without too much fuss.

4. Develop detailed character concept art
Procreate’s a solid choice for building detailed character concept art for games, comics, or just your own projects. Its brush engine is robust enough that you can sketch, ink, and render—all in one place, no need to jump between apps.
It usually helps to start by blocking out your character’s silhouette on a blank canvas. That way, you get the overall shape and proportions set before you dive into the nitty-gritty details.
Layer management is your friend here. Keep the rough sketch on one layer, line art on another, and colors on separate layers. It makes refining each part way less stressful—you won’t accidentally mess up something you liked.
If you’re using an Apple Pencil, Procreate supports pressure sensitivity for both lines and shading. That’s huge for adding natural line weight or subtle opacity, perfect for things like fabric folds, facial features, or hair.
Try out custom brushes to get different textures—skin, fabric, metal, whatever you need. You can tweak existing brushes or find brush packs made for character work (there are tons out there).
The symmetry tool comes in handy for faces or creatures. Turn it on and you can draw symmetrical features in half the time, plus it helps keep things looking accurate.
Bring in reference images by importing them right onto your canvas. Resize, move, or lower the opacity so you can use them as a guide for anatomy or proportions.
Color palettes are a lifesaver for keeping your character’s colors consistent. Save swatches for skin, clothes, accessories, and you won’t have to guess every time you come back to the project.
For shading and highlights, play with blend modes—Multiply for shadows, Add for light. It gives your character that extra bit of depth and makes them feel more three-dimensional.
When you’re finished, export your character as a high-res file, layered PSD, or even a time-lapse video. It’s super easy to share your work or move it into another program for more editing if you want.
5. Paint realistic watercolour landscapes

If you’re into watercolour, Procreate can actually mimic those effects surprisingly well by tweaking brush settings and blending modes. You can use watercolour brush packs or make your own by playing with opacity, flow, and texture. The digital setup gives you the freedom to build up soft washes and sharp details without worrying about drying times or paper buckling.
Start with a light sketch to map out your landscape—mountains, trees, water, whatever you like. Use lighter tones at first and build up color slowly, just like traditional watercolour layering.
Work in layers to keep different parts of your scene separate. Maybe one for the sky, another for the background, another for the foreground. It makes blending and editing way easier since you won’t mess up other areas by accident.
Try out blending modes like “Multiply” or “Overlay” for those transparent, watery effects. Lower the brush and layer opacity for softer transitions — it’s pretty close to how real watercolours behave.
For those classic uneven watercolour edges, go for textured brushes and use the smudge tool with a soft, wet brush. That way, you can blend colors naturally. Don’t be shy about zooming in for details or zooming out to check the overall vibe.
Add splatter and bloom effects by changing brush dynamics or using texture stamps. Little variations in brush pressure and angle go a long way to making things feel organic. And hey, the undo button is always there—so you can fix or tweak things without starting over.
It helps to look at real watercolour paintings or photos for inspiration. Notice how pigments mix, or how light glows through wet paper. Procreate’s color harmony tools are nice for testing palettes before you commit.
When you’re done, export your landscape at different resolutions, depending on whether you want to print or share online. With a bit of practice, you can really capture those delicate transitions and expressive details that make watercolour so lovely—all without breaking out your paint set.
6. Craft seamless pattern designs
Procreate actually makes it pretty doable to create repeating patterns right on your iPad. These are perfect for digital wallpapers, fabric prints, stationery, or whatever else you can think up.
Start with a square canvas (same width and height)—that’s key for making sure your pattern tiles smoothly without obvious seams.
On separate layers, play around with motifs, shapes, and colors. Focus on the center at first, but leave some space at the edges so you can adjust things later without headaches.
To check your pattern’s repeat, use the snap and transform tools. Move elements from one edge to the opposite edge so they’ll line up perfectly when tiled.
Procreate’s “Guides” feature is a big help for alignment. Turning on the drawing grid keeps your placement accurate as you move pieces around.
Once your central design and edge repeats are done, test the pattern by duplicating the tile and putting copies side by side. This is the best way to spot any mismatched lines or weird gaps before you call it finished.
Tweak your artwork as needed and save your tile as a JPEG or PNG. From there, you can use your seamless design for all sorts of digital or print projects.
Layer groups and masks are great for quick edits and color changes—super useful if you want to play with palettes or adjust shapes without redoing everything.
For extra depth, try blending textures or overlays with transparency and blending modes. It adds a bit of richness while keeping your pattern seamless.
Lots of designers make a pattern “swatch” to import into other software for surface design or textile printing. Procreate’s export options make sharing or reusing your tile really straightforward.
You can find pattern templates online, or just set up your own to speed things up for future projects. That’s especially handy if you’re planning to make a whole collection of patterns.
Don’t forget to experiment with Procreate brushes for unique marks and effects. Making custom brushes that fit your pattern style can be a fun rabbit hole, honestly.
Every so often, zoom out and look at your design at a smaller scale. It’s the easiest way to catch little inconsistencies before you wrap things up.
With some practice, you’ll get faster at making seamless patterns—and might even develop a signature look. Procreate’s tools are flexible enough to support just about any approach you want to take.
7. Produce animated GIF stickers
Procreate actually lets you make frame-by-frame animations right inside the app, which is pretty convenient. If you want to design animated GIF stickers, you’ll find the Animation Assist tool in the Actions menu—it’s surprisingly easy to use. This feature helps you treat each layer as a frame, and you get a live preview of your animation as you go, which is super handy.
Start by opening a new canvas, maybe around 500x500 pixels. That’s a good size for most messaging apps. Each layer you add becomes a new frame in your sticker’s animation. Say you’re drawing a waving hand—just sketch the hand in different positions across those layers. Doesn’t have to be complicated.
Once you’re happy with your frames, tap the Animation Assist bar at the bottom. Here you can tweak the playback speed and see how everything looks in motion. Adding or deleting frames is as simple as making new layers or duplicating ones you’ve already got.
When you’re ready to export, just head over to Share and pick the GIF option. Make sure to choose “Animated,” then adjust things like frame rate or whether you want it to loop. Procreate will spit out a looping GIF that’s good to go for messages or social media.
Honestly, keeping your GIFs simple—like blinking eyes, moving shapes, or bouncing icons—tends to work best. They’re easier to read at a glance and loop smoothly. Stickers you make in Procreate play nicely on WhatsApp, Telegram, Instagram Stories, and tons of other platforms.
Don’t be afraid to experiment with timing or style; sometimes little tweaks make a big difference. Just remember: bold, clear designs usually stand out better since stickers are seen so small.
Creating your own animated stickers adds a bit of personality to your chats, and you’ll get some animation practice along the way. Procreate’s pretty versatile, whether you’re making art or just having fun with digital stickers.
8. Sketch architectural concepts
With Procreate, sketching out architectural ideas is quick and actually kind of fun. Layers, custom brushes, and grids make it easy to lay down straight lines and structural shapes—it’s surprisingly good for perspective drawings, too.
If you’ve got a floor plan or a reference image, you can just import it and sketch right on top. That way, you can refine layouts or facades without having to start from scratch every single time.
Procreate’s perspective guides cover one-point, two-point, and even three-point perspective. These are lifesavers for getting depth and proportion right—kind of essential for architecture, right?
You can tweak brush settings to mimic technical pens, markers, or whatever tool you like best. Adjusting opacity and line thickness gives you a lot of control over details and shading, which is nice if you’re picky about that stuff.
Working in layers means you can try out different design options without messing up your original sketch. Make alternate layouts, test out shapes, or add landscaping—all without fear of ruining your base drawing.
If something’s not working, just erase or change it. The non-destructive workflow is perfect for iterating or sharing ideas with colleagues and clients. It’s pretty forgiving.
Export options let you save sketches as image files or layered PSDs, so bringing them into other design software or adding them to presentations is a breeze.
9. Restore old photographs digitally
Procreate’s actually pretty solid for restoring old photos. Just import your scanned image onto a canvas, and with the Apple Pencil plus Procreate’s brush tools, you get really precise control for touch-ups. Scratches, tears, and faded spots? You can fix those with the spot healing and clone features—it’s almost satisfying.
Use layers to keep different fixes separate. For example, dedicate a layer just for repairing cracks, and another for color correction. This way, you can undo or tweak any change without messing up the rest of your image.
There’s a bunch of brushes for blending and retouching. Soft brushes are good for gentle blends, while hard-edged ones help with sharper lines or borders. Play around with opacity and flow until the repairs blend in with the photo’s original texture.
If you’re fixing faded colors, try sampling from less-damaged areas. You can lay down gentle washes or use color balance adjustments to even everything out. For black and white photos, convert to greyscale and focus on contrast and detail—don’t overdo it, though.
Zoom in for the tiny cracks or intricate spots. Taking your time on those small details usually pays off. And if you mess up, the undo history’s always there—no need to panic.
When you’re finished, save the file in high resolution so you keep all that hard work crisp. Procreate makes it easy to share digital files or print physical copies, so your restored photos are ready for family or framing.
Lots of pro photo restorers use Procreate on the iPad because the touch interface just feels natural, and file support is solid. Honestly, it’s a lot less hassle than some desktop software. With a bit of patience, you can breathe new life into old photos—all from your iPad.
Understanding Procreate’s Unique Features
Procreate packs in a bunch of professional-grade tools, whether you’re an illustrator, designer, or just someone who likes to doodle with digital precision. The interface is customizable, and there are loads of controls for brushes, layers, and quick edits if you like to tinker.
Overview of Procreate’s Creative Tools
The brush library? Pretty massive. You get hundreds of brushes for sketching, inking, painting, and all sorts of effects. You can change brush size, opacity, and flow with on-screen sliders. Brush Studio is where you can make your own brushes or tweak existing ones, which is great if you’re picky about your tools.
Layers let you edit non-destructively. You can group, blend, lock, or mask them however you want. Blend modes like Multiply, Screen, or Overlay give you more control over color mixing and composition.
There’s animation stuff too—Animation Assist and a detailed timeline for frame-by-frame work. QuickShape, gesture controls, and selection tools help you work faster and get more precise shapes or edits.
Optimising Procreate Settings for Artistic Workflows
Getting your canvas resolution right is important. Procreate lets you set custom canvas sizes and DPI, which matters for print or web. You can even save templates, so you don’t have to set things up from scratch every time.
Custom gestures are a nice touch. Assign actions like undo, redo, or tool switches to gestures, and you’ll speed up your workflow—once you get used to it, you’ll miss it in other apps.
You’ve got color profiles like sRGB and CMYK for pro-level output, so your work looks right whether it’s printed or posted online. Time-lapse recording is built in, letting you capture your whole process automatically—no extra setup needed.
Leveraging Digital Art Techniques in Procreate
Getting the hang of digital art techniques in Procreate can really level up your work. There are plenty of tools and features for manipulating visuals in creative, flexible ways.
Utilising Layers and Blend Modes Effectively
Layers help keep your work organized and let you make changes without wrecking the whole canvas. You can separate out line-work, color fills, highlights—whatever you want—so you can experiment without worry and move things around as you like.
Blend modes change how layers interact. For instance, ‘Multiply’ is great for shadows, while ‘Screen’ works well for highlights. Procreate includes a bunch of blend modes like ‘Overlay,’ ‘Soft Light,’ and ‘Colour Burn’—each one gives you a different look depending on your colors and opacities. Sometimes it’s trial and error, honestly.
Use layer groups to keep your canvas from getting out of hand. Locking transparencies lets you add texture or recolor specific spots without painting outside the lines. Adjusting opacity gives you control over how bold or subtle each layer comes across.
Tips for Layer Management:
- Name your layers clearly (trust me, it helps)
- Try color-coded tags for quick sorting
- Only merge layers if you really need to keep the file size down
Incorporating Textures and Brushes for Unique Results
Textures and brushes really are the secret sauce for adding depth and a bit of your own flair to digital art. Procreate’s brush library? It’s packed—pencils, inks, charcoals, painting tools, you name it.
But hey, you don’t have to stick with what’s there. Importing or tweaking brushes lets you chase whatever vibe you’re after, whether that’s watercolor, stippling, or something a little more offbeat like grunge. Fiddling with stuff like flow, opacity, spacing, and shape can totally change your strokes and the way the surface feels. Sometimes just mixing a textured brush with some clever layering is enough to fake real-world media—or even invent something wild and new.
Want your backgrounds or main elements to feel more tactile? Try slapping on textured overlays or playing around with pattern brushes. Honestly, just messing around—maybe making your own textures with the ‘Import’ function or tweaking the ones you’ve got—gives you way more say over how everything turns out.
Suggestions for Texture Use:
- Try blending two (or more) brush types for surfaces that pop
- Use texture brushes at low opacity when you want just a hint of something
- Stack up textures for interest, but watch out for visual clutter
Conclusion
Procreate is so much more than a digital sketchbook — it’s a full-fledged creative studio right at your fingertips. From designing custom brushes and unique typography to animating GIF stickers and restoring old photos, the possibilities are nearly endless for iPad users. By exploring these nine innovative ideas, you’ll not only expand your artistic toolkit but also find new ways to express yourself and bring your creative visions to life.
So go ahead—experiment, have fun, and let Procreate help you turn your imagination into digital reality!