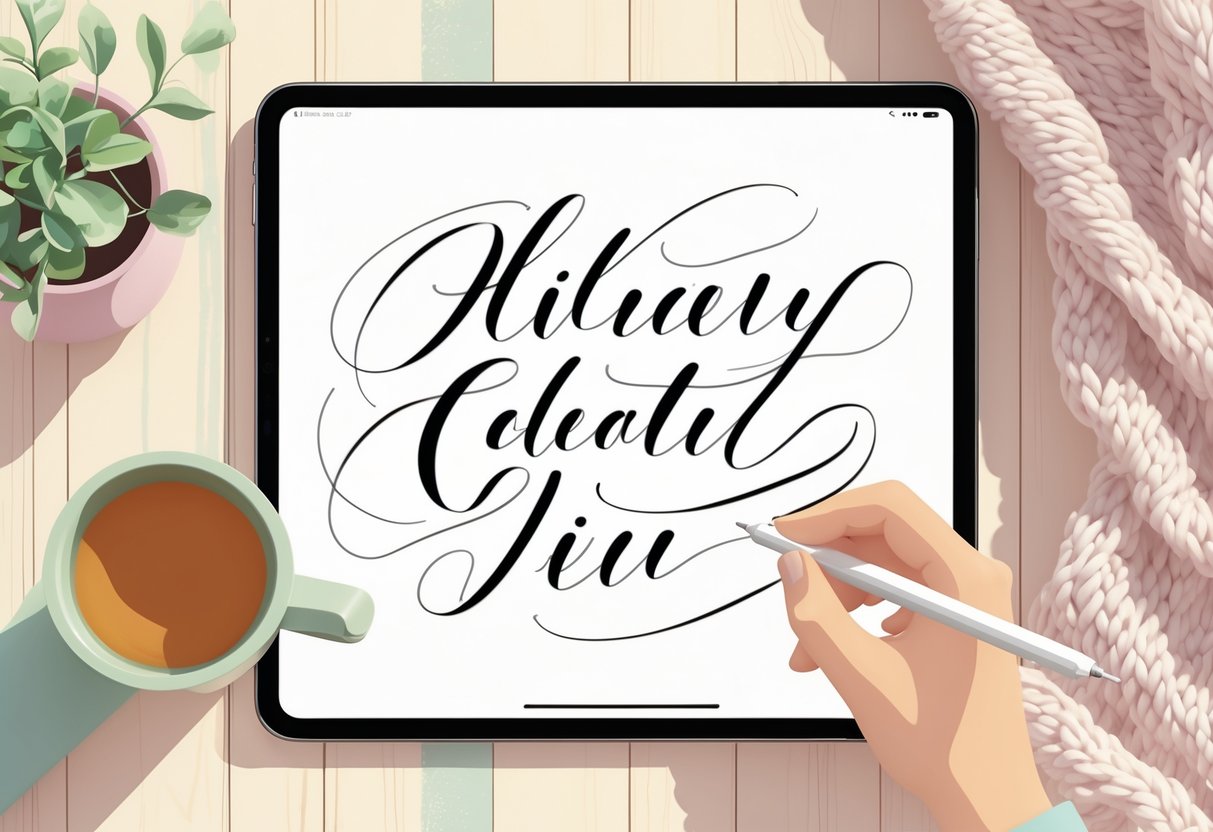
Turns out, you really can create gorgeous digital calligraphy right on your iPad with apps like Procreate or Goodnotes — it’s surprisingly easy to practise, tweak, and share your lettering as you go.
With an Apple Pencil and a good app, you get the kind of control and finesse you’d want for strokes, flourishes, and all sorts of calligraphic styles—without the inevitable mess of ink or stacks of paper piling up.

If you’re into Planjuli digital planners, digital calligraphy is a game changer — suddenly, your notes and headings look polished and personal, right on the page.
The iPad’s pressure sensitivity and smooth surface really do a great job mimicking traditional materials, so you can keep practising or try out new tricks whenever inspiration hits.
Getting Started With Calligraphy on iPad

Calligraphy on the iPad is kind of this sweet spot between old-school penmanship and the convenience of digital tools. Once you get the hang of your setup, apps and workspace, the creative process just flows a whole lot easier!
Required Tools for Digital Calligraphy
First, you’ll need a compatible iPad. Sure, the iPad Pro is the gold standard—big screen, super responsive—but honestly, any model that works with the Apple Pencil will do just fine.
The Apple Pencil’s pressure sensitivity is a must for those classic calligraphy strokes—without it, you’re just doodling. If you’re not on a Pro, double-check which version of the Pencil your iPad supports before you start shopping.
People swear by matte screen protectors like Paperlike; they give you that paper-ish feel and a bit more control. And if you’re picky, a drawing glove can help your hand glide and keep the screen smudge-free. Not a necessity, but hey, why not?
Here’s a quick checklist to keep things simple:
| Tool | Purpose |
|---|---|
| iPad / iPad Pro | Drawing and visualisation |
| Apple Pencil (Gen 1/2) | Precision input for calligraphy |
| Matte Screen Protector | Simulates paper, improves control |
| Drawing Glove | Reduces screen friction, keeps it clean |
Setting Up Your Workspace
Honestly, a comfy workspace makes a huge difference. Find a flat spot with decent lighting — natural light if you can swing it, but a desk lamp works too for those late-night sessions.
Prop your iPad up at an angle using a stand or your case; it’s closer to a real calligraphy desk that way. Make sure your wrist and forearm aren’t awkwardly dangling, or you’ll regret it after a long session.
Keep your Apple Pencil charged (seriously, nothing kills the mood like a dead stylus). Try to clear away distractions if you can. A tidy space just makes it easier to play around with new styles and keep your focus where it should be.
Choosing the Right Calligraphy Apps
Some apps just do it better. Procreate is a go-to for most folks — loads of brush options, easy layering, and it’s just… intuitive. Whether you’re a total newbie or a pro, it’s got your back.
Adobe Fresco is worth a look too, especially if you like both vector and raster brushes.
Affinity Designer is another solid pick for vector work and precision.
Then you have the famous Calligraphy Penmanship which provides an awesome experience and might just convince you calligraphy is actually worth the hype (and effort).
And of course, especially if your are just starting out and do not require any particularly advanced brush sets, you can choose to practice on your favourite note-taking app, like Goodnotes or Notability.
Another app you could test out is Tayasui Sketches or its calligraphy-specialised version Tayasui Calligraphy: we love it because it has one the cleanest and most streamlined user interfaces and it definitely provides a solid base for your lettering experiments.
Whatever you pick, make sure it supports Apple Pencil pressure sensitivity. Without that, it’s not really calligraphy, is it?
Before you settle, poke around at things like brush libraries, color pickers, and how easy it is to export your work. Figure out what fits your vibe — whether you’re into modern brush lettering or more traditional scripts like copperplate.
Fundamentals of Digital Lettering

Digital lettering is a fine blend of classic hand skills and modern tech. The key is knowing your letterform basics and picking the right digital brushes to get that real ink look.
Understanding Lettering Techniques
If you want to get good at digital lettering, you’ll need to get cozy with letter anatomy—stuff like strokes, spacing, and proportions. Knowing what ascenders, descenders, and x-heights are? Super helpful for making your work look consistent.
Start with drills — thin upstrokes, thick downstrokes. That contrast is what makes calligraphy pop. Apps like Procreate are forgiving, too; you can layer, undo, redo—no more tossing ruined pages in frustration.
Spacing is sneakily important. If it’s off, your whole piece just feels… wrong. Use grids and guides (Procreate’s got a handy Drawing Guide) to keep things lined up and balanced.
Different styles need different techniques. Brush scripts lean hard on pressure sensitivity—luckily, the Apple Pencil nails that. Serif and sans serif are more about getting your lines and curves just right. It takes a bit of practice, but you’ll get there.
The Role of Brush Pens in Digital Art
Brush pens are the unsung heroes of digital lettering. On the iPad, you can tweak and customize them to feel almost like the real thing.
In Procreate, start with the “Calligraphy” brushes or download some made by other artists (there are tons out there). Play with size and pressure curves until the lines feel right—getting that upstroke/downstroke variation is everything.
Here’s a quick side-by-side:
| Feature | Traditional Brush Pen | Digital Brush (Procreate) |
|---|---|---|
| Pressure Sensitivity | Manual, physical | Customisable, Apple Pencil |
| Ink Flow | Real ink, variable | Simulated, adjustable |
| Undo/Redo | Not possible | Always available |
Don’t be afraid to mess with opacity and texture settings to see what feels most “real.” Layer blending in Procreate is a fun way to add color, highlights, or shadows—stuff that’s way harder with traditional tools. The more you play around, the more control you’ll have, and honestly, you’ll probably get results faster than with pen and paper.
Mastering Procreate for Calligraphy
When you’re working in Procreate, precision and flexibility are everything for crisp, polished calligraphy. The Apple Pencil gives you the control, but custom brushes, smart layer management, and advanced tricks really take your work up a notch.
Creating and Importing Custom Brushes
Custom brushes open up a whole world of possibilities in Procreate. You can make your own from scratch or import brushes made by other artists—there are so many cool textures and effects to try. To make your own, hit the brush icon, tap the plus, and start fiddling with things like grain, shape, streamline, and taper.
Importing is easy. Download the brush file (.brush or .brushset) to your iPad, tap “+” in the Brush Library, and grab it from your Files app. Here’s a quick rundown:
- Check compatibility: Make sure the brush works with your Procreate version.
- Test settings: Play with opacity, pressure, and tilt to get a natural feel with your Apple Pencil.
- Organise: Sort brushes into folders by style or purpose—trust me, it helps later.
Don’t be shy about duplicating and tweaking brushes. That’s how you’ll find your own signature style.
Layer Management Strategies
Layers are your safety net. Put each letter, word, or flourish on its own layer—if you mess up, you don’t have to start over. Rename layers so you know what’s what (like “Shadows,” “Main Script,” “Guidelines”—whatever makes sense to you).
Try different blending modes like Multiply or Overlay for depth. Lock transparency if you want to color inside your strokes without bleeding everywhere. And group related layers together to keep things tidy.
Toggle layers on and off to compare versions or directions. For beginners, guide layers with lines at different angles are a lifesaver for keeping your calligraphy consistent.
Advanced Tips for Realistic Calligraphy
Procreate’s got some pretty advanced features if you want your digital work to look almost traditional. Tweak the pressure sensitivity and direction settings to get your Pencil acting more like a real brush or nib. Add texture overlays or paper grain as extra layers over your lettering for that tactile vibe.
QuickShape is a cheat code for perfect ovals and lines — super handy for guidelines. ColourDrop can quickly fill closed areas, which saves a ton of time on big pieces.
And don’t be afraid to let your work get a little imperfect. A bit of jitter or uneven spacing in your brush settings gives your calligraphy that organic, human-made feel. For even more realism, play with layer masks and blend modes to build up shadows, highlights, and that subtle “ink on paper” texture.
Practising Hand Lettering on iPad
Getting better at digital lettering is all about regular practice, paying attention to the little things, and exploring different calligraphy styles. The iPad Pro and apps like Procreate make it easy to experiment and refine your technique—whether you’re into classic scripts or modern styles.
Developing Your Style
Start by playing with brush settings and pressure sensitivity in your app. See how each stroke changes — sometimes it’s subtle, but those little differences add up. The more you practice, the more you’ll figure out what tools and settings just feel right for you.
Copy letterforms from artists you admire at first. Focus on consistency, spacing, and stroke order. Eventually, you’ll start adding your own spin. Save your practice sheets, check your progress, and don’t be afraid to try new shapes or layouts every week.
It’s worth trying a bunch of different brushes made for digital calligraphy and hand lettering. Play with size, opacity, and tilt to see what mimics real pens best. And sure, use the undo button—but try not to rely on it too much. Fixing mistakes is part of the process, but thoughtful control is where the real growth happens.
Modern vs Traditional Calligraphy Styles
Modern digital lettering is all about loose, expressive strokes and mixing up different typefaces, while traditional calligraphy sticks to classic forms like Copperplate or Gothic. On an iPad, flipping between these styles is honestly as simple as tweaking a brush preset or grabbing a new template—no mess, no fuss.
Here’s a quick side-by-side:
| Feature | Modern Digital Styles | Traditional Calligraphy |
|---|---|---|
| Structure | Flexible, freeform | Rigid, rule-driven |
| Letter Connections | Often disconnected | Usually connected |
| Tools | Custom, varied brushes | Replicas of dip pens, nibs |
If you’re just getting started, it might help to practice those traditional strokes first—it really builds up your muscle memory. Then, when you’re ready to get a bit more creative, you can jump into modern styles. The iPad makes it easy to try both, no need to buy a pile of supplies. You can even overlay guides or use practice templates for traditional scripts, which honestly does make keeping proportions way less of a headache.
Trying out both styles is the best way to figure out what you actually like and get more versatile with your hand lettering. Mixing and matching features from each can help your digital calligraphy stand out, but still feel cohesive.
Inspiration and Resources
Finding good inspiration and trustworthy learning materials is pretty much essential if you want to get better at iPad calligraphy. Checking out what top digital calligraphers are doing, diving into online tutorials, or hanging out in lettering communities can all help you improve and stay motivated. (And let’s be real, sometimes you need that extra push.)
Influential Digital Calligraphers
Looking at the work of respected digital calligraphers is a great way to get a feel for what’s trending or just see how other people approach iPad lettering. Ian Barnard is a big name — he shares time-lapse videos, brush set reviews, and step-by-step digital lettering guides. His Instagram and YouTube are packed with ideas for adapting hand lettering to the iPad. Worth a scroll, honestly.
Other folks to check out:
- Stefan Kunz: Does a lot with creative lettering layouts and often breaks down his Procreate process.
- Liz Kohler Brown: She’s known for tutorials on making your own brushes and for experimenting with digital calligraphy techniques that aren’t exactly traditional.
Studying these artists’ portfolios, joining their online demos, or trying out their brush sets can help you branch out and experiment with different styles, too.
Online Workshops and Tutorials
If you want to move from just dabbling to actually getting good, structured workshops really help. Skillshare, Domestika, Udemy—all of those have full digital calligraphy courses, usually with Procreate and Apple Pencil as the main tools. Some classes dig into the basics (like pressure and letter shapes), while others go deep into colour blending, textures, and composition.
You don’t have to spend money, though—there’s a ton of free stuff out there. Ian Barnard and others post tutorials on YouTube, including project-based lessons, live Q&A, and downloadable practice sheets if you like having something to follow along with.
Here’s a quick rundown of handy resources:
| Platform | Content Type | Availability |
|---|---|---|
| Skillshare | Full courses | Subscription |
| YouTube | Tutorials & demos | Free |
| Domestika | Masterclasses | Purchase |
| Udemy | Interactive lessons | Purchase |
Community and Social Platforms
Getting involved in active online communities is honestly a game changer. You get support, feedback, and sometimes a little nudge when you’re stuck or uninspired. Procreate’s official forums and the Lettering Daily Community on Facebook are both solid for asking questions, showing off your progress, or just meeting other people who geek out over digital lettering.
Instagram’s still huge for daily inspiration and connecting with calligraphers like Ian Barnard and Stefan Kunz. Hashtags like #digitallettering, #ipadcalligraphy, and #calligraphypractice are great for finding trending work and tutorials.
And if you want real-time chat, Discord servers dedicated to digital calligraphy and lettering have popped up everywhere. You’ll find critique sessions, brush-sharing channels, and plenty of people at every skill level.
Creative Applications of iPad Calligraphy
There’s a lot you can do with iPad calligraphy, whether you’re making stuff for print or digital use. The tools are flexible enough for both, and being able to tweak your brushes or draw with precision gives you a ton of control over your art.
Designing for Print and Digital Media
With iPad calligraphy, it’s pretty straightforward to create high-res designs for print or the web. Exporting in formats like PNG, JPEG, or PDF is easy, so your work plays nice with printers and digital platforms alike.
If you’re into print, you can design invitations, posters, greeting cards or stationery. Apps like Procreate or Adobe Fresco let you adjust canvas size, set up colour profiles, and use custom brushes for unique lettering effects — so you’re not stuck with generic looks.
For digital, your calligraphy can become social media graphics, website banners, or digital ads. You can edit on the fly, get creative with layers and preview how things will look in different formats.
Honestly, the digital workflow makes revisions way less painful and helps keep branding consistent across all your projects.
Creating Custom Digital Artworks
The iPad gives you everything you need to make completely custom calligraphy pieces. With a stylus and adjustable brush settings, you can mimic old-school styles or just invent something new if you’re feeling bold. 😉
You can mix calligraphic elements with illustrations, photos, or textures, which is perfect for things like album covers, art prints, or your own digital gallery.
Most advanced apps let you save favourite custom brushes and colour palettes. It’s fun to experiment with metallics, textures, or watercolour effects just by tweaking brush dynamics. Everything you make can be saved, shared or printed — and you can always go back and rework old pieces without messing up the originals.
Troubleshooting Common Issues
Tech hiccups can really throw off your flow with digital calligraphy. Making sure your Apple Pencil stays connected and your brushes behave on the iPad is key for getting those smooth, responsive strokes.
Addressing Apple Pencil Connectivity Problems
If your Apple Pencil is being stubborn or laggy, first check if Bluetooth’s actually on. Head to Settings > Bluetooth and see if it’s connected. If not, try removing it from the list and pairing again — it’s a bit annoying, but it usually works.
Make sure the Pencil’s charged up. Low battery is a sneaky culprit for weird input or sudden disconnects. For the 2nd-gen Pencil, snap it onto your iPad to charge; for the 1st-gen, use the Lightning connector.
If it’s still not working, give your iPad a restart. Sometimes the issue is with the app or iPadOS, so check for updates. If palm rejection starts acting up, toggle it off and back on in your calligraphy app’s settings.
And if you’ve tried everything else, take a look at the Pencil tip — if it’s worn down, replacing it can make a big difference.
Optimising Brush Performance
Brush lag, jitter, or weird pressure sensitivity can really mess with your lines. Make sure your calligraphy app is updated — apps like Procreate and Adobe Fresco keep improving their brush engines for better Apple Pencil support.
Check your custom brush settings too. Tweaking things like stabilisation, streamline, or the pressure curve might help your writing feel more natural. Play around with built-in presets and fine-tune from there, instead of building a brush from scratch every time.
To keep things running smoothly, close out any background apps hogging resources. Sometimes, just cleaning your iPad screen and the Pencil tip can boost sensor accuracy. If brushes still act up, reset them to default and tweak one setting at a time until it feels right.
Frequently Asked Questions
Whatever point of the learning curve you’re at with your calligraphy, there’s something out there for you if you want to simplify or deepen your practice. Here’s a rundown of the most frequent questions we receive on this topic.
What are the top apps for learning calligraphy on an iPad?
- Procreate
- Calligraphy Penmanship
- Tayasui Calligraphy
- Tayasui Sketches
- Adobe Fresco
- Goodnotes
- Notability
They are all solid picks. Each one has brush options and pressure sensitivity that work well for calligraphy.
Procreate stands out for its huge brush library and active community. Adobe Fresco is great if you want realistic ink effects and vector support.
How can beginners practise calligraphy on an iPad?
Start with practice sheets or grid templates in your calligraphy app of choice. Tracing basic strokes and letters is a good way to build consistency.
Play around with your Apple Pencil’s pressure and tilt settings if the app allows. Lots of apps also have guided exercises for learning the basics.
Is it possible to do professional calligraphy on an iPad?
Definitely. You can make high-res, print-ready calligraphy art on an iPad. Procreate and Adobe Fresco are both used by pros for commercial gigs.
You’ll find export options like PSD, PNG, and more — perfect for print or digital projects alike.
Can you recommend any free calligraphy apps suitable for the iPad?
Adobe Fresco has a free version with the main brushes. Calligraphy Handbook and Tayasui Sketches are also free and good for getting started.
Free apps usually have basic features and smaller brush libraries, but they’re an excellent way to test the waters.
How do I import custom calligraphy fonts onto my iPad?
Apps like iFont or AnyFont let you install custom fonts on your iPad. Once installed, you can use them in compatible apps like Procreate or your favourite note-taking app.
Some calligraphy apps also let you import lettering brushes or templates directly through their settings or file import tools.
Are there any calligraphy practice sheets available for iPad users?
Actually, yes! There are tons of artists out there who upload both printable and digital calligraphy practice sheets. If you use Procreate or Goodnotes, you’ll find some handy templates right inside the app. And honestly, places like Etsy or Creative Market? They’re packed with downloads that are already set up for tablets.
Once you’ve got your favorites, just import them into whatever note-taking or drawing app you like best, and you can practice right on your iPad screen. Super convenient!